This is a way long over due project. But finally, this morning I laid the last brush strokes on the canvas back drop. And took some pictures.
Before I go on and explaining the materials and how about I am doing it - I will divide this project in 4 stages. Since this is my first DIY photography back drop, everything I did here was based on my painting skill. I searched on the internet prior to do this - but I found none of them explaining it in detail. So since I am an artist - I thought to myself that this could not be that difficult. But wanted to start the project was a dragging for me. You know, in your head you wanted just to start and do the project but your physical being just won't move toward that direction. It kept telling me, do it tomorrow. Then the next day came - it kept on telling me the same thing again until months later. I knew I wanted to do this before summer ends. And it was already August. Because when the cold weather start to come my basement will be very cold and there is no way I could spend a long time working in the basement. So just to get me going, I hired a friend of mine to start it off and to do the ironing off of the creases and priming. Sure enough, after that I did not stop until this morning - it was 2 weeks a go.
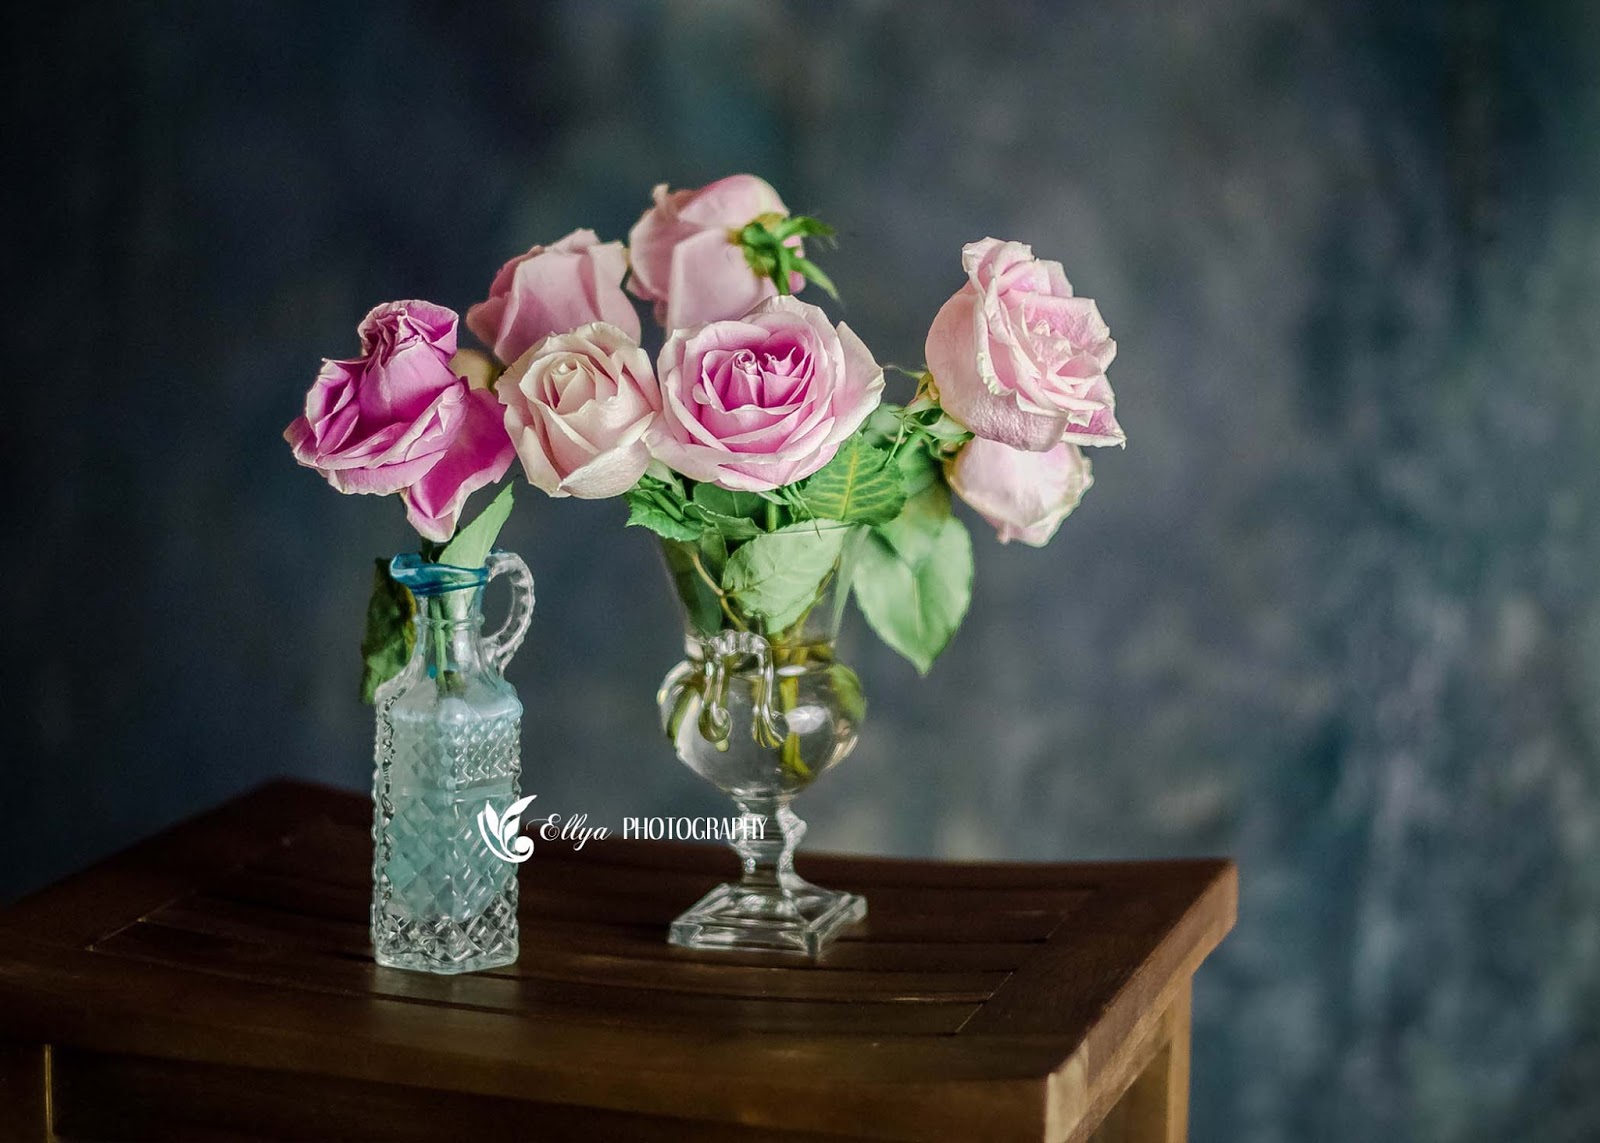
Now that it is finished, I could not be happier with the result. I can't believe it is so beautiful. I tested it out to photograph still life of roses - it is gorgeous. I can't wait in a few days I will have a beautiful model "Nicole" to be photographed in front of my DIY back drop.
So let's start with the material I used. It is very important to have all materials ready with in reach. Another equally important is a large space. But it all depends on the size of the back drop it self.
So now let's first talk about the material.
Get these materials from a Dollar store.
1. A mop with a rag attached to it USD 1.99. This is to drip the paint.
2. 3 large bowls USD 1.00 ea = USD 3.00
3. 2 Paint pails USD 1.50 = USD 3.00
Get these at Home Depot.
1. I used drop cloth bought size 9 feet by 12 feet at Home Depot through internet. Cost about USD 32.00
2. A roll of plastic wide enough to lay under the drop cloth so the paint won't seep through to the floor. Approx. USD 2.00
3. 2 cans of primer USD 9.00 each = USD 18.00
4. 2 cans of base or mid tone color from Behr brand USD 9.00 each = USD 18.00
5. A wide cheap paint brush USD 2.50
6. A medium size paint roller USD 5.00
7. 4 sample cans of paint, the darkest and the lightest USd 3.50 each = USD 14.00 (Mine is about 9 different sample paints but you do not have to)
Total = USD 99.50
First get the crease off of the folded drop cloth. I used steam iron. Then on an open space out door or in door like in a basement lay the plastic sheet and put the drop cloth on top of it. Using a roller, paint the primer on the entire drop cloth. You can dilute the primer with a little bit of water. Let it dry for 24 hours as per instruction. Then using the same roller, paint the base coat (this is your mid tone color). And let it dry for 24 hours. When it dries - put a generous amount of the lightest colors in paint bowl and put some water in it. Using the mob pick up some paint and drip it all over the cloth. Concentrating in the middle outward but do not let it covers the entire to side of the cloth. Then do the same with the darkest paint. Splatter it on top the brightest color. Let it dry. When it dries. Take the wide brush pick up the darkest paint on the tip of the brush and start dry brush the edge of the cloth.
STAGE 1
Your back drop will look a little like this.
I photographed an object in front of it. I used my son's teddy bear. But the texture of paint looks boring and too even out. I need to work more on this. At this point, taking picture is important because then you know what color need to put on and what area need more work.
STAGE 2
At this point the back drop looks too blueish in color. It needs dark green. So using a dry brush I dry brushed dark green here and there concentrate only on the outer part of the cloth toward the middle just a little. As you can see I added the darkest green but it shows a green spots, the ones I circled.
Now I need to see the contrast between the back drop and the object - since the teddy bear is in blue and brown in color, I bought some pink roses to see the contrast. And before I photographed the roses I dry brushed some of the dark green off with dark brown color - called "Potting Soil".
Now I started to like it more. It has green, brown, grey and blue on the canvas.
STAGE 2
Now I just have to see the brightest and the darkest and where all of these two colors being placed in relation to the model when standing up in front of it. I just have to use my judgement since I do not have anyone at home but me. Again, I used the roses as the model. I wanted the the darkest dark on my lower hand side and the bright in the middle toward upward on my right hand side. So I enhanced it a little more, using the color palette I had chosen earlier.
I also dry brushed the lightest color of grey aqua color just to make it pretty. And painted it lightly on the lightest part of the canvas.
Just to let you know that the location of this setting was in the basement of my house. So it was very dark. And my light source is coming from my right side. You can see it on the last picture.
STAGE 4
To add more contrast I added "Black Ink" on the lower hand side. For now, it is finished. And I can't wait to photograph a real model pose in front of it.
BLACK AND WHITE
She is ready to go.
I can't tell you how excited I am for a day after tomorrow I will photograph a real person in front of it. Can you imagine a young lady styled and wearing a soft color flowy gown and of course I would want her to wear a fresh flower crown posing in front of this back drop? Will keep you update on this for sure.
Thank you so much for stopping by.
Have a beautiful Tuesday!!